 I used Ulta In the Mood to do a newspaper mani. Cool huh? The words sort of get reprinted on your nail. Some people like to actually put the paper bits on their nails like a decoupage, but I prefer this technique. I think it looks so much better. I'd love to do a tutorial, maybe even a video, if you're interested :D.
This is the first nail I did and I think it looks so awesome! I'm really in love with this mani. On the right is another pic of the mani I took today (I actually painted them last night. I like to take pictures right after I do them usually. just in case I mess them up lol.
 I really like how it looked before the clean up too (below). You can see the ghost of the words on my skin and I thought it was neat.
 Now about this specific polish...If you read my previous post about my Ulta Haul I picked this up on clearance at Ulta.
 I think it's a pretty cool color myself. It's a light purple, not quite lavender, with quite a bit of light gray in it. It gets a good bit more purple in dimmer lights, which makes a fabulous and what I consider unique color. It's really quite pigmented and not a boring color at all. I took the above picture before the cleanup just in case it messed up. And guess what...it did. I have to say this formula was awful and I'm super close to never trying it again. I actually did it once before, and it was so bad I took it off. The application was so amazingly streaky that I felt like I had to do thick coats to make it look good. Well bad idea, because that promotes bubbles.
 You can't see half the bubbles in these pictures. It looked so freaking awful...I painted my nails at night, but not that late. I got carefully into bed after they had already been drying like an hour and figured it would be fine. When I woke up in the morning not only were my nails ruined even more, but they were still wet!! Like wet enough to leave fabric marks, wrinkle it, anything. GOD!
So...I did it again this time, with nice...pretty...thin coats. It looked much better and didn't bubble, but was still super streaky and took 3 coats. It could have used 4. Now even though I was super careful, I still had trouble with the polish this time. It didn't bubble, but stayed dry to the touch (not all the way dry) for the longest time. Even after the topcoat was applied, I usually use Sally Hansen Hard as Nails Xtreme Wear, same story. Now is this the topcoat's fault or the polish? I have used this top coat many times and rarely had this problem. I put a coat of Seche Vite QD Topcoat on before bed to make it dry and that worked wonders. Right now the mani is perfect, even a little wrinkle or two I caused with silly mistakes. That's probably the best thing about SV, it's magical imperfection perfecting skills.

Monday, January 31, 2011
Ulta In the Mood - Newspaper Mani!
Saturday, January 29, 2011
OPI Katy Parry Collection
 Welcome to the Katy Perry collection by OPI! From left to right it's: The One That Got Away, Teenage Dream, Last Friday Night, and Not Like the Movies. You might notice the Black Shatter isn't in this. That's because it was, of course, sold out. And I bought the mini collection. I'm totally okay with minis. These are particularly mini though, as I said in my Ulta Haul post.

The One That Got Away is a dark pink shimmer that appears more purpley in dimmer lights. She really is pretty. It has a little bit of a hot pink to it, but it's darker than that. I've seen some swatches that make it look red, but I don't get any red from it. It has a gorgeous pink shimmer in it and I think it's very pretty. This is two coats and the application was great.
 Teenage Dream is my favorite from this collection. It's a gorgeous pink glitter with so many elements. The base is a translucent baby pink, but it's really quite buildable. This is two coats and I think it looks pretty opaque. You'd probably still see a little nail line though. It has a ton of light pink shimmer that also flashes silver. There are both small and medium silver glitter specks in this polish that have the multicolored shine to them. The application was great. I just really like this polish! It's amazing layered over pretty much anything.

Last Friday Night is the blue cousin of Teenage Dream...but different. I use that phrase all the time. "The same...but different" lol. It has a light blue translucent base with blue and teal/green shimmer. This one has only the small round silver glitters instead of the medium like the pink. This polish is really quite intricate. The way the base interacts with the layers of glitter making them all flash differently...very cool. The overall effect makes me think of frost, plus a little more color. This is only two coats. It's pretty sheer, but more opaque that I thought it would be. The application was great. I think it's cool alone and definitely fun layered.

Not Like the Movies is a very interesting multichrome. It's gray, but flashes with green, purple, and has a good amount of silver shimmer. I think it's kind of unique including the shimmer. The application was great, but this is three coats. Interestingly enough this darker gray polish still has a hint of sheer to it. I don't think you'd really see a nail line, but you could see the light through your nail, you know? I will admit I liked the color better wet. It didn't have the green to it then. The green makes it interesting, but it's kind of weird for me.


 This is The One That Got Away Layered with Teenage Dream on the tip and Last Friday Night in the middle area. I couldn't capture how fab the pink one looked as a french tip, but it really is great. The blue glitter over the pink looks so awesome too. I really like that combo.

Deployment
Letting ya'll know why I haven't been on as much the last couple days...
My boyfriend Jeremy just left for deployment and this is my first time experiencing this. I'm at a loss as to how to deal with your significant other, whom you're used to living with and seeing constantly, going away for six months. I haven't been posting as much because I've been trying to squeeze every moment I could in with him. Now I'm not sure if I'll post more or less. School did just start, but so many people I have talked to say it's best to just keep busy.
So if any of you have gone through this or have some advice to add, please don't hesitate!
Friday, January 28, 2011
Zoya Astra


 Zoya Astra is a jelly based metallic finish polish as packed with glitter as it gets. The glitter is light pink and dark pink. The light pink glitter looks like silver at many angles, and the dark pink also turns hot pink and nearly red at times. The polish was very easy to apply, smooth, and not chunky or funky like some giltter polishes can be. I didn't have to try to get the glitter in the right place or anything because there is just so much of it! The base is a pretty seriously pink jelly, so it technically is translucent, but I really think you can hardly see the base through all the glitter. This is a good thing! It's still translucent enough that you could use it for a really cool gradient or a buildable mani. I might try that with Nova, Astra's purple sister, that I also bought.
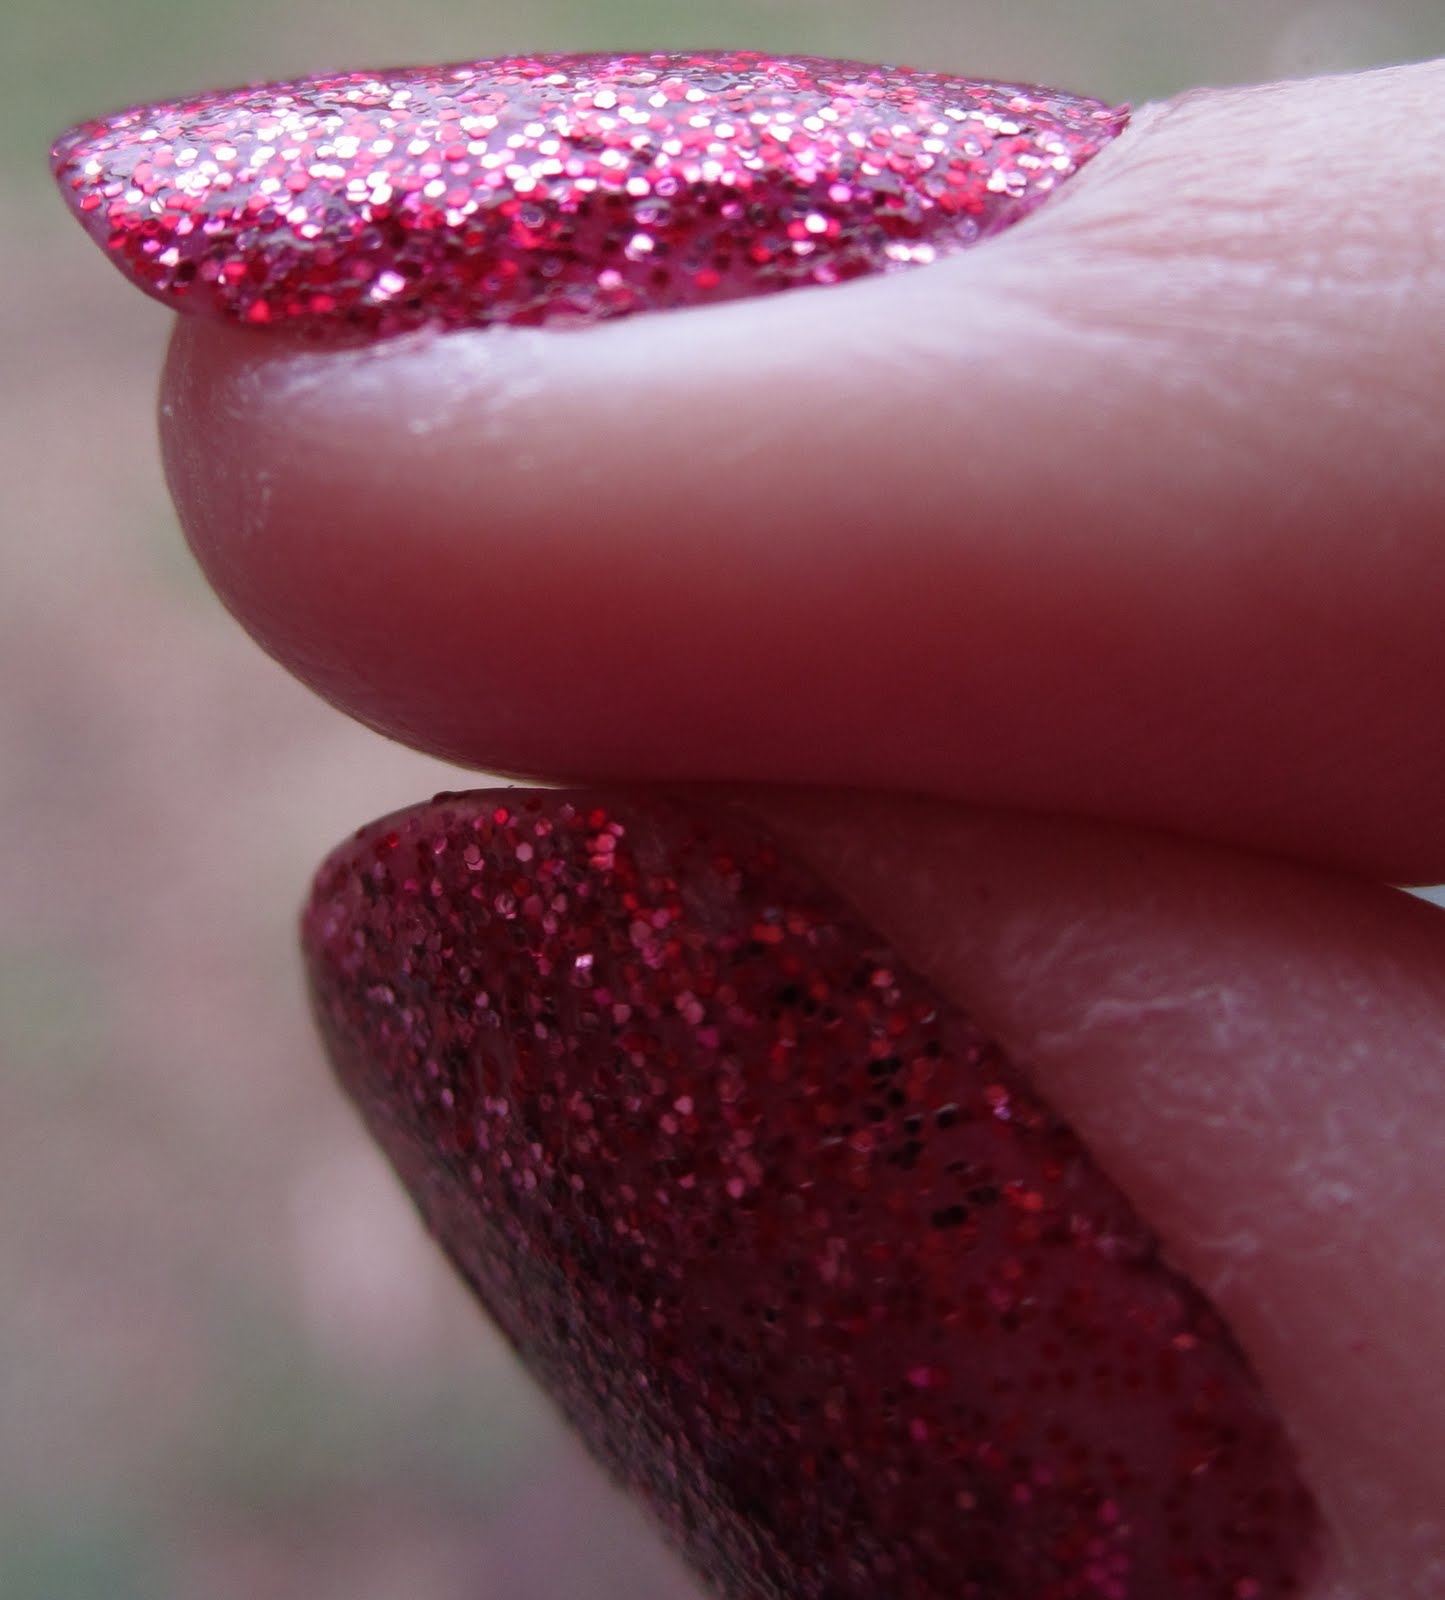
You might think that being a glitter polish it would have a rough surface to it. I'm here to tell you, even without a topcoat, Astra is very smooth! I mean it isn't the glass finish that you would get from a cream, but I was very surprised. Check out the vies from the side. No bumps or anything!
The most stunning thing about Zoya Astra for me was that she's even gorgeous in the dark! This glitter can pick up even the smallest pinpoint of light and use it to its best advantage. I was just amazed as I would walk into a dimly lit area of the house and my fingers would still be sparkling!

Wednesday, January 26, 2011
Tutorial and Review: The Teabag Method
The Teabag Method, as I call it, is a way you can patch a nail break and continue on polishing as normal. You know those breaks that threaten to drastically decrease your nail length...hate those. You can use it for any break really. This is the first time I have done it and I LOVE it! See the break?
Short version: nail glue, teabag piece, nail glue, and buff
Long version:
The tools you'll need are some nail glue, a teabag, some celophane/plastic wrap, a nail buffing block or file with a gentle grit, and scissors. Start with nails that are fully prepped for polish (remover, cuticles, moisturized, remover).
1. Cut the top of the teabag off and pour out the tea. Cut or pull the teabag apart to make it into a sheet. Then cut a small piece that is at least the width of your nail and about half an inch longer. Bigger is better otherwise you might end up having to start over and cut another piece. 2. Take the small piece and place it on your prepped nails. Using your other hand, hold it on your nail and use your fingernails to crease the paper to fit your nail. This will make a nice line to cut on. Don't worry about getting it all right in one go. That's why we made it a bit big. Trim the cuticle and side edges carefully, but the free edge at the end you can trim after you put on your nail if you need to. I liked trimming it before. This doesn't have to be freaky perfect. It just has to be really close and definitely covering the break. Cut out the piece for your nail.
 3. Apply nail glue all over your nail in a nice thin coat. You don't have to be perfectly even because when you put the teabag piece on it will spread out the glue a bit anyway. Using a nail glue with a brush will be easier, but I used the super cheap squeezy kind just fine. Put the teabag piece on your nail pretty quickly, as nail glue can dry fast.
4. Don't worry if it isn't perfectly in the right place. You have a couple minutes to adjust it by using the celophane. It's just nice and slippery and doesn't stick to the nail glue. Also use this time to rub out any wrinkles and bubbles. Get it just right, then let it dry a bit - about 3-5 minutes.
5. Apply a second coat of nail glue on top of what you already have. Let this dry until hard, about 10-15 minutes. This is your completed patch for your break. Next you need to make it pretty. 6. Buff out the top slowly and gently, making sure you don't go through that top layer of glue. I didn't have any problem with this, so don't worry too much. Also buff the rough part on your free edge. Make sure you do all this gently! Less is more! It doesn't have to look pretty right now, it just has to feel smooth. This picture is my complete patch. Ignore the pink lines on the edges. I tried outlining first and decided the "crease method" is way better. It looks all dry and funky, but it's really quite smooth.
 Here is my totally complete patch with my Seche Ridge Filling Base Coat on, ready for polish. You can't even tell, even with this quite sheer base coat on. It's really fabulous and I love it!
Let me know if you have any questions, if you've tried it before, or if you try it after reading my tutorial!
Sunday, January 23, 2011
My First Ulta Haul
 I went to Ulta today for the second time ever. The first time I just walked around in awe. I only just discovered it in the last couple of months as my addiction has been more obvious ;). Ah, the temptations, the beauties that lie there...
 And the clearance section! Oh what a fabulous thing! I had found where I wanted to be most in the world. There was Borghese, Piggy Polish, Ulta, China Glaze, OPI, Orly, so many I have never tried and so many I wanted. I ended up banking with four items from Ulta today.


As I said before, I've decided I'm totally okay with minis. It isn't as much bang for the buck, but it's cheaper and I'll never use more than this. They do seem pretty seriously mini though. Check out the second pic. It's like...smaller than a battery. Either way, I'm excited to try them out.
Now...shall I swatch these for you? :D
Saturday, January 22, 2011
Zoya Tiffany


Isn't she just gorgeous? Yes I call Zoya's she's lol. Almost all of their polishes are named a woman's name, which I think is great. My name, Megan, is a french manicure pink. I might just need to get it :P.
The formula was good for this polish, just a little odd. I thought at first that it was a bit streaky and was almost chunky...But really as I was applying it and noticed a bit of a bald spot, I applied a bit more to the brush, tapped it to my fingernail, and it filled in like magic. It ended up just fine. The peach/pink/copper polish is packed with microglitter in silver, gold, pink, and peach. It leaves you with a really interesting and feminine foilish finish. It really is gorgeous and I can't stop looking at it.

Friday, January 21, 2011
Zoya Cola
Zoya Cola was one of my 3 free picks from Zoya's promotion at the beginning of January. I got her yesterday, along with Tiffany and Kelly, which I will post for you later.


I did hear a couple people say that they received bottles that had broken. I actually thought their packaging was really great, and in fact unique. Check out that weird gray packaging material that Zoya wrapped my polishes in. It's thick like a sheet of cotton or something, but actually looks really cool. They were then place in a bubble wrap lined envelope. I did notice a small tear in the outside of the envelope though. This leads me to believe that the few people who did have broken polishes had them at the fault of the shipping process and not Zoya.
 She went right on my toes! I found the polish to be pretty great. There was no streakiness, it was a good consistency, and the brush was average. This was two coats using Seche Ridge Filling Base Coat and Seche Vite Top Coat.
 |  |

I had the urge to do a little pre-Valentine's Day nail art. What do you think? :D
Shelter Update!
Shelter is over now and I got a couple more pictures from the work I did there. I tried to take pictures with my camera, but after trying to snap one I realized I had left my sd card in my computer at home! Diane, the shelter head manager and mastermind, assured me I'd get the ones she took :D.
 |  |
